Moonlight Peaks Guide

Best Moonlight Peaks crops and farm layout for Happy Mandrake, Scarecrows, 9x9 Firefly Pollinators, Beehives, Aquaflux, makers, and animals.

Version: PC 1.1.45 and release-build sourcesEvidence: mixed
A vampire standing among organized crop rows on a Moonlight Peaks farm
Official Moonlight Peaks promotional game image. © Little Chicken Game Company.Official press kit

Moonlight Peaks Farming Guide — Best Crops, Seeds & Layout

Quick answer: for a farm layout that will survive later unlocks, begin with one Scarecrow-covered regular field, one 4×4 magical crop block for Aquaflux I, and a path between crops and makers. Reserve a separate flower plot for the Beehive and leave large empty footprints for a Barn and Mill. After reaching 10% Museum completion, rebuild one crop zone around a Firefly Pollinator's documented 9×9 grid and place a Firefly Sanctuary beside active crops to supply its Fire Drops.

For crop choice, buy in-season seeds from Luna's Seed Stall. Blood and White Grapes are strong Spring/Summer starters because they regrow and become wine in a Keg. For direct sales, launch guides highlight Carrot in Spring, Skunktail in Summer, and Pumpkin in Autumn. Cranberries provide a regrowing Keg crop in Autumn/Winter. A Gobbler is a higher-effort Summer magical crop: water it with Aquaflux and feed it the fish or Critters it requests before harvest.

There is no single best crop for every farm. The answer changes depending on whether you can process produce, support Mana watering, and wait for a regrowing crop to pay back its seed cost.

Best Moonlight Peaks Farm Layout

The best farm setup is a set of functional zones, not one giant field. This leaves room for new helpers and buildings without forcing you to wait for planted crops to finish.

Zone Recommended setup Reason
Regular crop block Keep every important tile inside the Scarecrow's visible protection area; put the Well on the path edge Prevents crow losses and reduces Watering Can travel
Magical crop block Start with 4×4 crops Aquaflux I covers a documented maximum of 16 crops, so a compact block is easy to target and budget Mana for
Quality crop block Put a Firefly Pollinator near the center of a measured 9×9 grid The official Wiki documents a 9×9 effect that allows nearby crops to reach higher quality
Fire Drop supply Put the Firefly Sanctuary within or beside an active crop zone Sanctuary output depends on nearby crops; the Pollinator consumes 5 Fire Drops each day
Flower and honey zone Put the Beehive inside a flower plot and check its placement highlight Flowers inside the useful area increase Honey output
Herb zone Leave at least one walking approach to every Herb Garden Tightly packed garden beds can block planting access
Maker lane Line Kegs, Refiner, Furnace, and Mana Extractor along a clear path Universal storage supplies ingredients, so makers do not need to touch the matching field
Building reserve Keep clear footprints for the Barn and Mill Buildings can later move with Hoisthaven, but planted crops do not have a verified transplant action

The Pollinator's 9×9 description does not guarantee 81 plantable crop tiles. Its own footprint, paths, obstacles, and the exact interpretation of “around it” reduce the usable count. Current player reports also note that the Pollinator may not show the same clear area preview as the Scarecrow or Beehive. Count the grid from the placed helper and test crop quality before duplicating the design across the whole farm.

Do not assume the Scarecrow, Firefly Sanctuary, and Pollinator share one identical radius. Position each for its own job: use the Scarecrow's placement coverage for protection, keep the Sanctuary close to crops for Fire Drop production, and measure the Pollinator's documented 9×9 quality block separately.

Farm layout by progression stage

  1. First nights: clear only a small field, place the Scarecrow so its shown range covers the entire block, and leave a path to the farmhouse and shipping area.
  2. After the Well and Refiner: put the Well beside the regular field, create a short maker lane, and reserve a flower corner for the later Beehive.
  3. After Aquaflux I: add a 4×4 magical field rather than mixing spell-watered crops randomly through the regular field.
  4. After the 10% Museum reward: create one 9×9 Pollinator-centered quality zone and add the Sanctuary close to active crops. Keep at least 5 Fire Drops available per Pollinator per day.
  5. Before buying animals: reserve the Barn footprint and a direct path to its trough. Expand livestock only when the Fiber-to-Fodder loop can support it.
  6. Late farm design: move makers and buildings with Decorate Mode or Hoisthaven, then add decorative paths after the productive zones work.

Farm layout problems and fixes

Problem Check first
Crows still take crops Lift or preview the Scarecrow and confirm the affected crop is inside its shown protection area
Magical crops do not progress Use Aquaflux rather than the regular Watering Can and reserve enough Mana for the whole block
Pollinator does not improve quality Confirm it has 5 Fire Drops for the day and that the crops are inside the measured 9×9 area
Sanctuary produces little Move it closer to an active crop block; its yield depends on nearby crops
Beehive output stays low Put flowers inside the hive's highlighted radius, not merely elsewhere on the farm
Herb Garden cannot be planted Remove a neighboring obstruction and leave an approach tile
The farm has no room for a Barn or Mill Let current crops finish, then redraw the zone; Hoisthaven moves buildings, not confirmed planted crops

Your Farming Night

The normal schedule runs from 6 PM to 6 AM. A standard night lasts about 15 real minutes, with shorter and longer settings unlocked through progression.

The basic loop is:

  1. prepare soil with the Shovel;
  2. plant seeds from the inventory;
  3. water regular crops with the Watering Can;
  4. use the required spell on magical crops;
  5. harvest by hand or with the Scythe when ready;
  6. process or cook the crop before selling when possible.

The Watering Can can be used while walking, and the Scythe can collect multiple ready crops efficiently without damaging unready plants.

Best Crops by Season and Goal

The table below is a practical shortlist, not an invented universal profit ranking. Direct-sale choices come from TheGamer's release-build comparison; Keg choices favor crops that regrow and can be processed repeatedly.

Season Strong direct sale Strong processing choice Why it works
Spring Carrot Blood Grape, White Grape, Strawberry Grapes and Strawberries regrow; turn them into wine or juice instead of selling the base fruit.
Summer Skunktail Blood Grape, White Grape, Strawberry Continue the Spring Keg field rather than buying a completely new processing crop.
Autumn Pumpkin Cranberry Pumpkin has a high base sale value; Cranberry regrows and gives Kegs repeat work.
Winter Clawy Vera Cranberry, Dark Strawberry Clawy Vera is a high-value single harvest; the other two support repeated harvests and processing.

Once magic farming is established, Moonfruit is an all-season utility crop, while sources calculating raw 28-night returns favor different magical crops by season. Those calculations assume uninterrupted Aquaflux watering and do not include processing capacity, so early farms should not treat them as guaranteed profit.

Best early crop

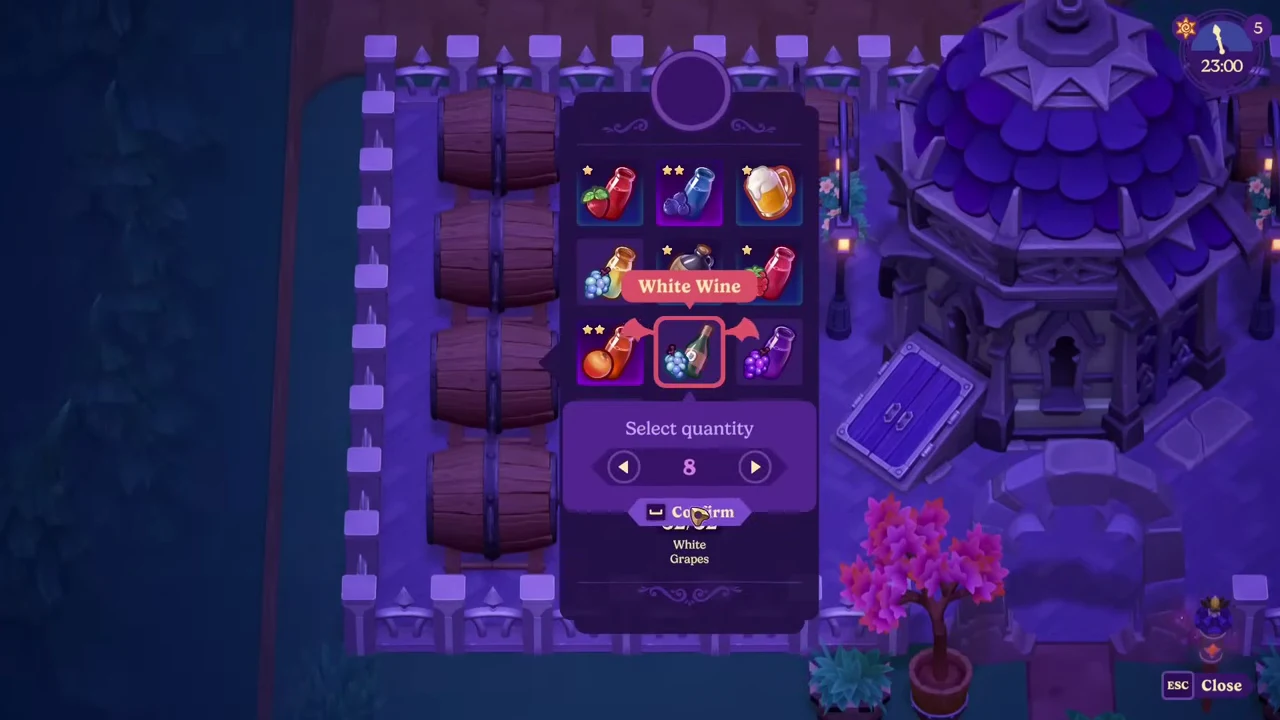
Use the free Blood Grape Seeds from Orlock, then add White Grapes if Luna has them. Both grow in five nights and regrow every four nights during their listed seasons. Their raw fruit is low-value; the advantage comes from repeated harvests and Keg processing.

Best crop when you have no free maker slots

Choose a strong direct-sale crop: Carrot in Spring, Skunktail in Summer, or Pumpkin in Autumn. This avoids creating a pile of fruit that cannot enter a Keg or Jam Maker.

Blood Grapes: The Opening Crop

One of the first story tasks asks you to grow Blood Grapes and make wine for Orlock. They introduce two different processing goals:

  • juice finishes faster and helps restore early Energy;
  • wine takes longer and is a stronger money-making product.

Keep enough grapes for quests and Energy instead of putting the whole harvest into one product.

Regular vs. Magical Crops

Regular crops use the Watering Can. Magical crops require a watering spell—review coverage names Aquaflux—and do not respond to regular water.

Eurogamer's post-launch list documents 53 seeds, with Luna's stock changing by season. Examples include all-season Onion and Blood Tomato, Spring/Summer Blood Grape, all-season Moonfruit requiring Aquaflux, and seasonal Herb or Mushroom seeds.

Some magical crops have additional behaviors. Full-game footage described crops that:

  • need to be fed a bug or fish;
  • water nearby soil like a sprinkler;
  • dry surrounding soil;
  • transform into a different crop through magic.

The game does not explain every quirk when seeds are purchased. Plant a small test group before committing a large field.

How to Grow a Gobbler

The Gobbler is a Summer-only magical crop sold by Luna for 350 Coins in the current Moonlight Peaks Wiki and Neoseeker tables. It takes six nights, yields one Gobbler, and must be watered with Aquaflux.

Water alone is not enough. The crop chooses fish or Critters for you to feed it while it grows. The current Wiki table specifies two requested fish or Critters per plant; Prima Games also warns that the requested type varies from one Gobbler to another. Stockpile inexpensive catches before planting a large block, then interact with each plant and follow its prompt.

Gobbler is especially useful after the Mana Extractor unlocks. The Wiki's extraction table lists a base Gobbler at 400% Mana, while Prima describes that as four times the base Mana Essence output. This makes it a strong Mana crop, but not a passive one: every tile also consumes spell Mana, two catches, and daily attention.

Published sale values currently disagree: the Wiki lists 500 Coins at base quality, while Neoseeker lists 550 Coins and calculates an 800-Coin raw profit per tile over a 28-day Summer. Check the current shipping value before copying either figure into a large-farm plan. For a first test, plant four Gobblers rather than an entire Aquaflux field.

How to Grow a Happy Mandrake

The Happy Mandrake is an Autumn magical crop created through spacing, not a separate seed packet. Buy a Mandrake seed from Luna for 200 Coins, water it with Aquaflux, and allow six nights to grow.

Plant the Mandrake with at least two full empty tiles between it and every other Mandrake. Adjacent or tightly packed Mandrakes become the angry form instead. For a reliable Happy Mandrake:

  1. create a separate Mandrake strip outside the compact 4×4 magical field;
  2. leave two empty crop tiles between each planted Mandrake;
  3. keep every plant inside a manageable Aquaflux route;
  4. reserve the first Happy Mandrake for the Museum before processing extras.

A base Happy Mandrake sells for 330 Coins in the current official crop table. Its stronger use is Mana: the current Mana Extractor table lists a base Happy Mandrake at 180%, compared with 60% for an Angry Mandrake.

Happy Mandrake is also used in Mana Mandrake Soup with 1 Nightshade Powder and 1 Mana Essence. That recipe restores 4 Mana in the official cooking table. This makes isolated Happy Mandrakes useful for Mana recovery even though their spacing makes them unsuitable for the usual high-density farm layout.

Where to Buy Seeds

Luna's Seed Stall sells seeds that match the current season. Orlock supplies the opening Blood Grape Seeds, but Luna is the repeatable source for normal crop seeds.

Magical seeds are not all available immediately. Progress The Magic of Crops, repair the Wand, and learn Aquaflux I; Luna's stock expands as that quest line advances. Magical crops must be watered with Aquaflux rather than the regular Watering Can.

If a seed is missing, check the season and quest progress before assuming the shop rotation is random.

Muse Tree and Gramophone requirement

The Muse Tree is a special all-season fruit tree sold by Luna for 6,000 Coins. Eurogamer and Bonus Action list 25 nights to mature and a new harvest every 7 nights. Unlike an ordinary fruit tree, it needs a Gramophone nearby; TheGamer says the Gramophone is required to produce fruit, while the community crop table describes it as required for both growth and fruiting.

Place the Gramophone before committing to the 25-night wait. If a mature Muse Tree is not producing, check the nearby placement first rather than buying another sapling. Published tables still leave the fruit's sell value unconfirmed, so the 6,000-Coin sapling should be treated as a long-term collection or processing investment rather than a guaranteed best-profit crop.

A post-launch 95-hour playthrough gives one useful placement check: Muse Trees inside the Gramophone's reach visibly sway or move when the setup is working. If the far end of a row remains still, reposition the Gramophone or shorten the row before waiting another growth cycle. Treat the animation as a practical player-observed indicator rather than a documented tile radius.

All three release sources list the tree for Spring, Summer, Autumn, and Winter. Eurogamer also reports that the Aborascend spell can move a mature tree without destroying it, which is safer than cutting down a poorly placed 6,000-Coin sapling.

Herb Gardens

Herb seeds cannot be planted in a basic soil plot. Eurogamer documents them as requiring an Herb Garden, and magical herbs such as Nightshade and Wolfsbane also require Aquaflux.

Bonus Action reports that the Herb Garden blueprint uses processed Wood Planks. Check the current Workbench for exact material requirements before crafting several.

Tools

Permanent tools use a selection wheel and do not occupy normal inventory slots.

Confirmed early tools and activities include:

  • Shovel for soil;
  • Watering Can for regular crops;
  • Sickle for grass and harvesting;
  • Axe and Pickaxe for farm clearing and resources;
  • Fishing Rod and Net, received after early progression.

Upgrade tools through Ridge at Howling Hammer, which is open Monday through Friday. Both GameSpot and TheGamer agree on the material pattern: bring the current tool plus 3 Bars of the next metal tier.

Upgrade Required tool and materials Published Coin cost
Rusty to Copper Rusty tool + 3 Copper Bars 1,000 Coins in both checked guides
Copper to Iron Copper tool + 3 Iron Bars 2,000 in GameSpot; 4,000 in TheGamer
Iron to Gold Iron tool + 3 Gold Bars 3,500 in GameSpot; 16,000 in TheGamer

The two major launch guides conflict sharply on Iron and Gold prices, so check Ridge's current shop before saving an exact amount. The material requirements are consistent across both. Prioritize the Pickaxe first because each tier opens larger mineral nodes needed for later upgrades, then the Axe for stronger trees and logs.

An Iron Pickaxe is only one half of the Gold gate: the earliest documented deposits are across the Cave of Echoes lake and also require Mermaid form. See the Gold Ore and Crystal Cave mining guide for the route, Rose Quartz requirements, and Gold Bar recipe.

The same three-tier material pattern applies to the Axe, Pickaxe, Scythe, Shovel and Watering Can. The Premium Fishing Rod is a separate late upgrade; see the Fishing Guide for its checked requirements.

Makers and Processing

Early playthroughs confirm several important stations:

  • Keg: juice, wine, and other processed drinks;
  • Refiner: turns Wood into Planks, Stone into Refined Stone, and Fiber into Fodder;
  • Furnace: bars, charcoal, glass, and other refined materials;
  • cooking and crafting stations inside the house.

Processing raw crops is usually more valuable than selling immediately. Build multiple Kegs once fruit production starts outrunning one machine.

Fodder and Farm Animals

The Refiner turns 1 Fiber into 2 Fodder. Put Fodder into the barn's trough; the trough shows how many nights of feed remain for the animals currently housed there.

Animals consume different amounts each night. Do not adopt up to the building limit until the Fiber-to-Fodder supply can keep the trough stocked. Neoseeker documents Premium Fodder as a later recipe, but normal Fodder is sufficient for the early livestock loop.

Luna offers three animals beside her house each day. After the first Barn quest, the selection rotates, including different color patterns. Each Barn holds four animals and the two release guides checked do not document a Barn-capacity upgrade, so build another Barn if you want the full set.

Farm animal unlocks, prices, and products

Animal Unlock Luna's price Documented product
Cheeken Day 2 story / Farm Animals for Sale 1,200 Coins Egg; TheGamer also lists Golden Egg
Piggoat Build the first Barn and finish Luna's quest 3,500 Coins Piggoat Milk
Draculamb Build the first Barn and finish Luna's quest 4,500 Coins Draculamb Milk and Wool
Cowcula Build the first Barn and finish Luna's quest 6,000 Coins Cowcula Milk
Bumpkin Reach Fall, Year 1 and read Luna's letter 12,000 Coins Plops
Stoney Reach Winter, Year 1 and read Luna's letter 9,000 Coins Heart Stone
Rabbicula Reach Spring, Year 2 2,800 Coins Product still unconfirmed in the checked guides

All livestock come from Luna; if the species or color you want is missing, check again the following night. TheGamer reports the first Barn at 4,000 Coins, purchased from Ridge after Luna introduces the livestock quest. Construction timing differs slightly between the two release guides, so rely on the delivery estimate shown in Ridge's current shop.

Ridge can handle only one construction job at a time. If you also want the first house expansion, finish the Barn or other story-required building before committing him to the 8,000-Coin house project.

Beehives and Honey

Luna sends the Beehive blueprint by letter during early friendship progression; Bonus Action received it before reaching a full heart in Spring Year 1. Craft one at the Workbench with:

  • 10 Hardwood Planks
  • 20 Fiber

Hardwood Planks require 3 Dark Wood each in the Refiner. You can cut Weeping Willows in the Howling Marshes with the starting Rusty Axe; the large fallen logs around the farm require a Copper Axe. Use the Dark Wood route and Refiner recipe before committing 30 Dark Wood to one Beehive. Bonus Action and Neoseeker independently publish the same 10-Hardwood-Plank and 20-Fiber recipe.

A Beehive produces Honey on its own, while flowers placed inside the glowing placement radius increase the number of jars produced.

Place the hive inside a flower area, not beside an unrelated crop field. Interact with it after adding flowers to check the current production bonus. Honey sells for 20 Coins in the cited release guide and is also used in cooking and gifts; exact output per batch can change with flower coverage or patches.

Can You Move Crops or Farm Buildings?

Placed furniture and crafting stations can be repositioned in Decorate Mode. Buildings such as the Barn, Mill, and farmhouse require the Hoisthaven spell, sold at Webb of Wonders for 2,000 Coins in the checked release guide.

The public guides checked do not document a reliable transplant action for an already planted crop. Do not confuse Hoisthaven's “move a building” effect with moving plants. Until an in-game prompt proves otherwise, plan crop blocks before sowing and let a misplaced crop finish its cycle.

Storage

The house contains universal storage that feeds crafting, cooking, potion, and processing stations directly. Reviewers did not find a practical item limit.

Decorating mode is the exception: it cannot pull furniture from universal storage. Put the items you want to place into the bag first.

Early Farming Priorities

  1. Grow enough Blood Grapes to support both juice and wine.
  2. Buy a Well before expanding beyond what can be watered comfortably.
  3. Match planting volume to Keg and Jam Maker capacity.
  4. Reserve Mana before planting a large magical-crop field.
  5. Turn spare Fiber into Fodder before expanding the Barn.
  6. Leave room for buildings because planted-crop relocation is not verified.

Sources

Related: How to Plant Seeds · House Upgrade Guide · Money Guide · Refiner & Crafting Guide · Museum Guide · Mana Guide